Landing in Seoul without an internet connection is like trying to navigate a neon maze blindfolded. From calling a ride on local transit apps to translating street signs in real-time, your smartphone is your ultimate survival tool in South Korea. For United States tourists traveling in 2026, relying on your domestic carrier for international roaming can lead to massive bills or frustratingly slow data speeds. A local embedded subscriber identity module, widely known as an eSIM, allows your smartphone to connect directly to South Korea’s top-tier networks right when your plane touches down. This guide walks you through the entire process of choosing, purchasing, setting up, and maximizing a South Korea eSIM so you can focus on enjoying your vacation.
Why a South Korea eSIM Beats Other Options
When planning your trip from the United States to South Korea, you will find three main ways to stay connected: international roaming through your current carrier, renting a portable physical Wi-Fi router, or using an eSIM. Looking at the costs and convenience makes the choice clear.
U.S. carriers often charge high flat daily rates for international roaming, and those costs pile up fast on a two-week vacation. Even worse, your home provider might throttle your internet speed after you use a tiny amount of data, leaving you stuck with sluggish connections when you need maps the most.
Renting a portable Wi-Fi hotspot device, often called a pocket Wi-Fi, used to be popular, but it comes with major downsides. You have to stand in long lines at airport counters after a tiring thirteen-hour flight just to pick it up. You also have to carry an extra device in your bag, keep it charged, and worry about losing it or paying a hefty penalty. At the end of your trip, you must return it before boarding your flight back home.
An eSIM updates this entire experience. It is a completely digital cellular chip that is already built into modern smartphones. You do not need to pull out your current physical SIM card or slide a new piece of plastic into your phone tray. You simply buy a digital profile online, scan a quick response code, and tap into local cellular networks. You keep your physical U.S. SIM card active in the background, which means you can still receive important text messages from home while using local digital data for your daily vacation needs.
The following table breaks down how these options compare for a standard traveler.
Comparison of South Korea Connectivity Options
| Feature | U.S. Carrier Roaming | Portable Wi-Fi Rental | Local South Korea eSIM |
| Physical Hardware | None | Extra device to carry and charge | None, entirely digital |
| Average Cost | High ($10 to $15 per day) | Medium ($5 to $10 daily plus deposit) | Low (budget-friendly plans) |
| Airport Lines | None | Long pickup and return lines | None, ready before arrival |
| Risk of Loss | Low | High (requires financial deposit) | None |
| Internet Speed | Often throttled or slowed down | Fast local 4G or 5G | Blazing fast native 4G or 5G |
| Dual SIM Support | No | Separate connection | Yes, keeps home number active |
Checking Device Compatibility and Carrier Unlocks
Before spending money on a digital data plan, you must complete two crucial checks. If your phone fails either step, your digital travel plan will not function when you land.
Verifying eSIM Support on Your Smartphone
Not every smartphone has the internal hardware required to support digital SIM profiles. As a general rule, if your device was manufactured in recent years, you are likely ready to go.
For Apple users, every model starting from the iPhone XS, iPhone XS Max, and iPhone XR supports this feature. If you have an iPhone 14, 15, 16, or newer purchased in the United States, your phone is entirely digital and does not even have a physical tray.
For Android users, Samsung Galaxy devices starting from the S20 series and Google Pixel phones starting from the Pixel 3 support digital profiles.
To double-check your specific device, open your smartphone settings application. On an iPhone, go to Settings, select Cellular, and look for an option that says Add eSIM or Add Cellular Plan. On an Android device, navigate to Settings, tap Network and Internet, select SIMs, and see if you can download a mobile network profile. If you see these options, your hardware is ready.
Confirming Your Phone Is Carrier Unlocked
This is the step that most frequently catches United States tourists off guard. Even if your phone has the correct internal hardware, it cannot connect to a different network if it is locked by your domestic service provider.
When you buy a smartphone on a monthly payment plan or sign a multi-year contract with carriers like Verizon, AT&T, or T-Mobile, they lock the device to their network until it is fully paid off. A locked phone will completely reject a South Korean data profile.
You must check your unlock status before you head to the airport. On an iPhone, navigate to Settings, tap General, select About, and scroll down to Carrier Lock. It should explicitly say No SIM restrictions. On an Android phone, you can check under the Network status settings, though the exact wording varies by manufacturer.
If your phone is locked, call your United States carrier immediately. Explain that you are traveling internationally and ask them to unlock the device. If your device is fully paid off, they will usually process the unlock within a few hours. Do not leave this to the last minute, as carrier customer support lines can take time to process these requests.
Choosing the Right South Korea Network Provider
South Korea has some of the fastest internet infrastructure on earth. The entire country is covered by three massive national telecommunications networks. When you browse for digital data plans online, your provider will be piggybacking on one of these three networks.
SK Telecom
Often referred to as SKT, this is the largest and most prominent mobile provider in South Korea. It offers the absolute widest coverage across the entire peninsula and leads the market in data download speeds. If your travel itinerary involves riding trains through rural areas, hiking up remote mountain paths in national parks, or visiting distant coastal islands like Jeju, an eSIM that utilizes the SK Telecom network is your top choice. It provides a incredibly stable connection that rarely drops, even when you are far away from major cities.
KT
Formerly known as Korea Telecom, KT is the second largest carrier and is famous for its massive network stability. Their infrastructure handles immense amounts of digital traffic effortlessly, making it an incredible option for urban explorers. If you plan to spend most of your vacation navigating the sprawling subways of Seoul, café-hopping in Busan, or streaming video while sitting in crowded urban centers, a KT-powered profile will give you a highly consistent, premium experience.
LG Uplus
LG Uplus is the third major national network. While it historically lagged slightly behind the top two in rural coverage, it has made immense upgrades in 5G infrastructure in recent years. LG Uplus often provides excellent speeds inside major metro areas and is highly popular for standard city tourism. Plans utilizing this network are frequently packed with great perks, such as bundled local transportation options or competitive pricing for high data amounts.
Finding the Best eSIM Retailer for Your Travel Style
When you buy an digital profile, you can either purchase a global travel package from an international digital marketplace or source a local prepaid tourist option directly from South Korean distributors.
Global Travel Marketplaces
Companies like Airalo, Nomad, Saily, and voilà operate as digital storefronts for international travelers. They partner with networks around the world to sell straightforward data packages.
The biggest benefit of using a global marketplace is extreme convenience. You can download a single app on your smartphone, select South Korea from a dropdown list, pay in United States dollars, and manage your plan through an English interface. They are ideal for standard tourists who want a rapid, low-friction transaction and do not mind paying a slight premium for a user-friendly experience. These packages are almost exclusively data-only, meaning they do not include a local phone number.
Local South Korean Providers
If you want a more authentic local experience or need advanced features, look into local brands like Chingu Mobile, or direct tourist packages offered on the websites of SKT, KT, and LG Uplus.
Local providers excel because they offer specialized tourist plans that fit regional needs perfectly. For instance, many local packages give you truly unlimited high-speed data without sudden slowdowns. More importantly, local options frequently come with a domestic phone number starting with the digits 010. Having a local phone number can completely transform your vacation experience, which we will break down in detail later.
Capped Versus Unlimited Data Plans
When picking a plan, you must decide between a set data cap or an unlimited package. Your choice depends heavily on how you plan to use your smartphone during your vacation.
Capped Data Packages
A capped plan gives you a specific amount of data, like five, ten, or twenty gigabytes, which you must use within a set number of days. These plans are highly budget-friendly and work perfectly if your data needs are minimal. If you primarily plan to use your phone for looking up directions on maps, sending text messages to family back home, using translation tools, and checking train schedules, a ten-gigabyte plan will easily last you a week or two. Just ensure you utilize your hotel Wi-Fi at night to download offline media or update your apps so you do not burn through your data limit early.
Unlimited Data Packages
An unlimited plan removes all worries about data monitoring. You pay a flat rate for a specific number of days, usually ranging from three days to a full month, and you can use as much internet as you want.
However, you must read the fine print carefully. Many travel companies sell packages labeled as unlimited, but they actually include a daily high-speed limit, such as one or two gigabytes per day. Once you hit that threshold, your speed gets severely throttled to a slow pace until the clock resets at midnight.
If you want true high-speed access for remote work, continuous video streaming, or heavy photo uploads, look for premium plans from local providers that guarantee unthrottled speeds or drop down to a usable speed like three megabits per second after the limit. This speed is still fast enough to stream video and navigate around town smoothly.
Step-by-Step Purchase Guide
Buying your digital travel profile is simple and can be done weeks before your trip begins. Following a clear order ensures you have everything ready before your plane leaves the runway.
Select Your Provider and Plan
Browse through the available options on your chosen app or website. Match the validity period of the plan precisely to the duration of your trip. If you are staying in South Korea for twelve days, do not buy a ten-day plan assuming you can stretch it; instead, purchase a fifteen-day plan to ensure you have complete coverage until you step back onto your flight home.
Complete the Checkout Process
Add the plan to your digital cart. Most international marketplaces accept standard United States credit cards, debit cards, PayPal, Apple Pay, and Google Pay. If you are buying from a local South Korean provider, you may need to submit a digital scan or photo of your U.S. passport page. This is a mandatory safety regulation under South Korean law to verify the identity of foreign tourists purchasing telecommunication lines.
Save Your Delivery Details
Within minutes of completing your payment, you will receive an automated confirmation email. This email will contain your unique activation profile, which is almost always presented as a QR code, alongside manual alphanumeric codes. Keep this email safe, take a screenshot of the QR code, or print it out on a piece of paper. You will need to scan this code to install the profile onto your device.
Preparing Your Phone for Installation Before Departure
The golden rule of digital travel profiles is to handle the initial setup while you are still sitting safely at home in the United States. Trying to set up a brand-new cellular connection while standing in a busy foreign airport using spotty public Wi-Fi is a recipe for immense frustration.
Complete the Setup at Home
Set up your plan the evening before your flight or right before you head to the airport. To install the profile, your smartphone must have a stable, secure internet connection, and your home Wi-Fi network is the best place for this.
Installing the profile does not mean your travel plan starts ticking away immediately. For almost all South Korean tourist plans, the billing cycle and active days do not begin until your phone actually connects to a local tower in Incheon or Busan. Setting it up early simply loads the digital data onto your chip so it is ready to fire up the moment you land.
Label Your Cellular Lines Clearly
When you add a second profile to your smartphone, your device will ask you to name each line to avoid confusion. Label your primary United States phone line as Home or Primary. Label your new South Korean profile as Travel or Korea. This clear labeling makes it simple to manage your data toggles later and prevents you from accidentally routing expensive web browsing through your domestic carrier.
Complete Walkthrough for Installing on iPhone
Setting up a digital profile on an Apple device is highly streamlined. Follow these steps carefully to ensure a seamless installation.
Step 1: Open Cellular Settings
Unlock your iPhone and open the Settings application. Scroll down and tap on Cellular.
Step 2: Add the New Profile
Look for the section labeled SIMs and tap on Add eSIM. Your phone will open a specialized camera interface designed to scan network profiles.
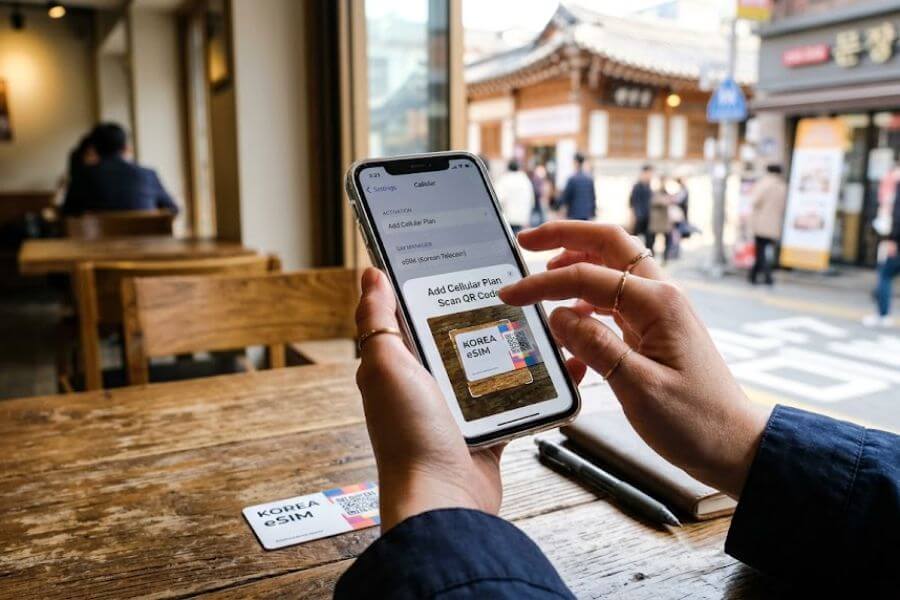
Step 3: Scan the QR Code
Point your iPhone camera at the QR code you received in your email confirmation. If you are viewing the QR code on the same phone, you can choose an option to upload a photo from your camera roll, or simply copy and paste the manual alphanumeric string provided in your activation email.
Step 4: Confirm Installation
A prompt will appear stating A cellular plan from this carrier is ready to be added to this iPhone. Tap Continue at the bottom of the screen. Allow your device a minute or two to communicate with the digital servers and register the profile onto your internal chip.
Step 5: Assign Labels
Once registered, your iPhone will ask you to choose a label for the new plan. Select the custom option and type in Korea to keep things clear.
Step 6: Set Default Lines for Home and Travel
Your phone will now ask you to set your defaults for three specific categories:
- Default Voice Line: Choose your Primary U.S. line. This ensures your friends can still call your usual number if needed.
- iMessage and FaceTime: Select your Primary U.S. line so your ongoing group chats do not break or split into separate threads.
- Cellular Data: Choose your Primary U.S. line for now while you are still at home. You will switch this over to your travel profile later.
Step 7: Turn the Travel Line Off Temporarily
After finishing the setup, tap on your new Korea profile inside the Cellular menu and toggle the switch to Off. Keep it off during your long flight across the Pacific Ocean to preserve your battery life and keep your phone clean.
Complete Walkthrough for Installing on Android
Android devices have a slightly different menu layout depending on whether you use a Samsung Galaxy or a Google Pixel, but the core logic remains identical.
Step 1: Access Network Options
Open your device Settings. Tap on Connections or Network and Internet, then look for the menu option titled SIM Manager or SIMs.
Step 2: Download Your Mobile Profile
Tap on the button that says Add eSIM or Download a SIM instead. Click Next when the phone asks if you want to download a network profile.
Step 3: Scan the Provided QR Code
When the camera viewfinder opens up on your screen, scan the QR code from your confirmation email. If you need to input the details manually, look for a button at the bottom that says Enter code manually and paste the string from your provider.
Step 4: Add the Profile to Your Chip
A confirmation dialog will appear asking if you want to add this plan to your device. Tap Add or Download. Wait a brief moment while your smartphone processes the configuration.
Step 5: Name and Customize Your Icon
Once the profile downloads successfully, go back to your SIM Manager menu. Tap on the newly added profile, change its name to Korea, and select a distinct color icon so you can easily identify it at a glance.
Step 6: Keep the Line Deactivated for the Flight
Ensure the toggle switch next to your new Korea line is set to Off. Your phone is now preloaded and ready to connect to local networks the instant you touch down in South Korea.
Activating and Toggling Your Data Line Upon Landing
The moment your flight lands at Incheon International Airport and the flight attendants say you can use your electronic devices, it is time to turn on your local data connection. You can complete this entire process while your airplane taxiing to the gate, meaning you will have full internet access before you even step foot into the terminal.
Step 1: Turn Off Airplane Mode
Disable airplane mode on your device so your internal antennas can begin searching for wireless signals.
Step 2: Turn on Your Travel Profile
Go back into your phone’s cellular or SIM settings menu. Tap on your labeled Korea profile and flip the toggle switch to On. Give your phone about thirty seconds to scan the local airwaves. You should see the network name, such as SKT, KT, or LG U+, appear next to your signal bars at the top of your screen.
Step 3: Switch Your Primary Data Line
In your cellular settings, look for the option labeled Cellular Data or Mobile Data. Tap it and switch the selection from your home U.S. carrier directly to your new Korea line. This tells your smartphone to route every single megabyte of web browsing, map usage, and translation through your local South Korean package.
Step 4: Turn on Data Roaming for the Travel Line Only
This is a critical step that confuses many first-time travelers. You must click into your specific Korea profile settings and ensure that the Data Roaming switch is toggled to On.
Because your travel profile is technically a roaming account managed by an international digital partner, it requires data roaming to be active on that specific line to pull internet from South Korean cell towers.
Step 5: Keep Data Roaming Off for Your U.S. Line
To avoid unexpected fees, click into your primary United States phone line settings and verify that Data Roaming is turned strictly Off. This double-layer setup ensures your phone uses your domestic line only for basic, emergency incoming text messages while routing all internet traffic through your affordable South Korean data package.
The Power of a Local South Korean Phone Number
When browsing for digital data plans, you will notice that data-only plans are slightly cheaper than plans that include a local phone number. While saving a few dollars is tempting, getting a plan that includes a local South Korean phone number starting with 010 offers immense advantages for tourists.
Navigating South Korea’s Unique Digital Ecosystem
South Korea has a highly advanced digital infrastructure that relies on phone verification for basic daily services. Major global apps like Google Maps do not function well here due to national security laws regarding geographic data mapping. Instead, you must use local applications like Naver Maps or KakaoMap to find walking directions, locate restaurants, and check bus schedules.
Similarly, instead of using standard international ride-hailing services, you will need to use Kakao T to call local taxis. Many of these essential local applications require you to input a valid phone number to create an account, verify your identity, or message your taxi driver. If you only have a data-only plan, you might find yourself completely locked out of these highly useful travel tools.
Scoring Table Reservations and Joining Virtual Lines
South Korea’s food scene is legendary, but visiting popular restaurants, trendy cafés, or famous street food spots often requires waiting in long lines. To keep sidewalks clear, most popular spots do not use physical lines anymore. Instead, they place a digital tablet stand outside their front door running a waitlist system called Catch Table or Catch Table Global.
To secure a table, you must walk up to the tablet and input a phone number. The system then places you in a virtual queue and sends you real-time text updates via SMS or local messaging apps when your table is ready.
If you do not have a functional number that can receive local incoming text messages, you cannot join the virtual line, meaning you might get turned away from the best culinary spots in the city. Having a 010 number gives you the freedom to secure your spot in line and explore the surrounding neighborhood until your table is ready.
Troubleshooting Common Connectivity Issues
Even with careful preparation, technology can occasionally experience minor hiccups. If you find yourself staring at an internet connection that refuses to load after landing, remain calm and walk through these common troubleshooting fixes.
Check the Data Roaming Toggle
If your phone shows full signal bars next to the local network name but web pages refuse to load, the culprit is almost always a disabled roaming toggle. Go to your settings, click directly into your travel profile, and double-check that Data Roaming is switched on.
Perform a Manual Network Selection
Sometimes, your smartphone gets confused trying to choose between competing cell towers at a busy airport and fails to latch onto the correct network. You can fix this by overriding your phone’s automatic choices.
On an iPhone, go to Settings, tap Cellular, select your travel line, tap Network Selection, and turn off the Automatic toggle. Your phone will take a minute to scan the airwaves and display a list of all nearby networks. Manually tap on the specific network your provider runs on, such as SKT or KT.
On an Android device, navigate to your SIM settings, find your travel line, look for Access Point Names or Network Operators, disable the automatic scan, and choose your network manually from the generated list.
Update Your Access Point Name Settings
For certain budget digital providers, your smartphone might fail to automatically configure its Access Point Name, commonly known as an APN. The APN acts as a digital bridge connecting your phone to the broader internet.
If your data is not working, check the installation email sent by your provider. They will include specific APN settings if required, which usually consist of a single word like “mobiledata” or “emov”.
To input this on an iPhone, go to Cellular, select your travel line, tap Cellular Data Network, and type the provided word into the APN text fields. On an Android phone, go to your SIM settings, tap Access Point Names, click Add New, type in the exact details provided by your retailer, and save the profile.
Complete a Full Device Restart
It sounds incredibly simple, but turning your phone completely off and back on is one of the most effective ways to clear out digital glitches. A fresh reboot forces your phone’s internal modem to clear its temporary memory cache, restart its searching protocols, and establish a clean connection with local cell towers.
Essential Travel Apps to Download Before Launching Your Trip
Once your data is up and running, your smartphone becomes an invaluable pocket guide. Because Western applications often have limited functionality inside South Korea, downloading these local alternatives while you are still on your home Wi-Fi will save you immense amounts of time and stress.
Naver Maps
This is the ultimate navigation app for South Korea. It provides highly accurate walking routes, real-time bus and subway arrival countdowns, and detailed interior layouts of massive train stations. It also includes an extensive directory of restaurants, complete with user reviews, photos, and menus. The application features an excellent English interface, making it simple to navigate through complex city streets.
Kakao T
This is South Korea’s premium ride-hailing application. It allows you to call standard city taxis, luxury vehicles, or large passenger vans directly to your exact location. The app maps out your route, gives you a precise fare estimate before you get in, and translates your destination into Korean for the driver. You can set the payment method to Pay to Driver inside the app, allowing you to pay with your standard physical international credit card or local currency at the end of the ride.
Papago
While global translation tools are decent, Papago is the gold standard for Korean translation because it is developed by Naver, the country’s top search engine. It understands contextual nuances, slang, and polite honorific speech far better than any other tool.
The app features an incredible camera translation mode that lets you hold your phone up over handwritten menus, confusing street signs, or product labels to read them in clear English instantly. You can also download the Korean language pack for offline use before your flight, ensuring you can communicate even if you find yourself in a rare dead zone without a signal.
Frequently Asked Questions
Can I make standard international voice calls to the United States using a South Korea eSIM?
Standard tourist plans are designed almost exclusively for digital data and incoming communication. They generally do not include outbound international calling credits. If you need to call home to update your family or contact your bank, use internet-based communication services like FaceTime, WhatsApp, Skype, or Zoom. These applications utilize your local data connection to make high-quality voice and video calls back to the United States without incurring any traditional long-distance phone charges.
What happens if I use up all my data allowance before my vacation ends?
If you purchase a capped plan and burn through your data early, you will not be completely cut off from the world. Most providers will send you an automated text message warning when you hit eighty percent and one hundred percent of your limit. Inside that text notification or within the provider’s smartphone application, you will find a straightforward option to purchase a top-up data bundle. You can easily add an extra gigabyte or two to your active profile using your credit card, and the extra data will activate instantly without requiring you to install a brand-new profile.
Will installing a travel eSIM change or delete my saved contacts or photos?
No, installing a digital travel profile modifies only your phone’s network routing configurations. It is entirely separate from your device’s internal storage drive. All your personal photos, saved text message history, downloaded applications, contact lists, and settings remain completely untouched and secure. The digital profile simply functions as an invisible second antenna that tells your phone how to talk to local South Korean towers, leaving your personal data completely safe.
Can I share my internet connection with other devices using a personal hotspot?
Whether you can share your data depends entirely on the specific rules set by your chosen provider. Most standard capped plans allow you to turn on your phone’s personal hotspot feature freely, letting you connect your laptop, tablet, or a friend’s phone to your cellular feed.
However, many truly unlimited tourist plans strictly block or limit hotspot tethering to prevent network congestion. If you plan to work remotely from a laptop during your trip or want to share a single data plan with a family member, look closely at the plan specifications before buying to ensure it explicitly permits mobile hotspot usage.
Do I need to remove my physical United States SIM card from my phone tray?
You should leave your physical United States SIM card inside your phone tray. Modern smartphones are designed with dual-network capabilities, meaning they can manage two separate communication lines simultaneously. By leaving your domestic card in place, your phone can keep your regular home number active in the background to receive important security verification codes from your bank or emergency text messages, while your travel profile smoothly handles all your daily internet data needs.
How do I completely delete the travel profile once my trip is over?
When you return home to the United States, removing the travel profile takes only a few taps. Open your phone settings, go into the cellular or SIM manager menu, click directly onto your labeled Korea profile, and look for the option labeled Delete eSIM, Remove Plan, or Erase Cellular Plan. Tap it and confirm your choice. Your phone will permanently wipe the digital travel profile from its internal chip, allowing you to instantly switch your primary data settings back to your domestic carrier.


