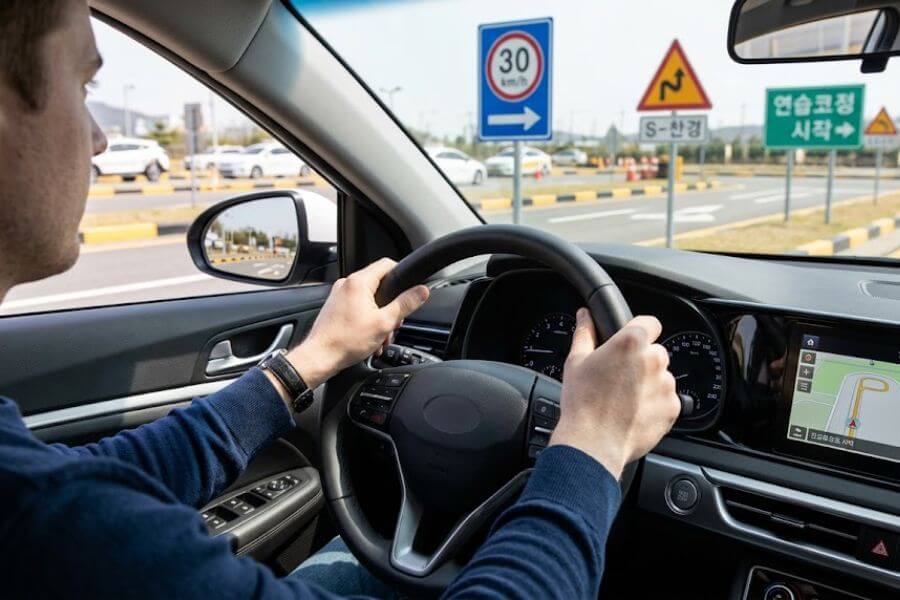
If you are a foreign resident looking to master the roads in South Korea, obtaining a local driver’s license from scratch is your ticket to ultimate freedom. The process involves a structured sequence of safety education, health screenings, a written exam, an internal course trial, and an on-road driving examination. This complete blueprint breaks down every single phase to ensure you walk into the testing center fully prepared and walk out with your new Korean driver’s license in hand.
Understanding the Korean Driver’s License Categories
Before you fill out any application forms or study a single rule, you must understand how South Korea classifies its standard driving privileges. The choices you make at this initial stage dictate the vehicle types you can operate, the difficulty level of your upcoming evaluations, and the scoring system used to judge your performance. For the vast majority of foreign residents, the choice comes down to two specific categories.
Class 1 Ordinary License
The Class 1 Ordinary License is a robust credential designed primarily for those who need to operate larger vehicles or manual transmissions. Holding this certification allows you to operate passenger vehicles, utility vans that seat up to fifteen passengers, and cargo trucks with a weight capacity under twelve metric tons.
The testing criteria for this specific class are notably stricter because of the size and manual nature of the vehicles involved. If you choose this path, your vehicle during the practical evaluations will typically be a manual transmission pickup truck. You will need to demonstrate flawless clutch control, smooth gear transitions, and a firm grasp of how a larger vehicle handles tight corners.
Class 2 Ordinary License
The Class 2 Ordinary License is the most popular choice for everyday commuters, international students, and casual drivers. This category is tailor-made for standard passenger cars, SUVs, and smaller vans that accommodate up to nine passengers.
One of the greatest benefits of this category is that it allows you to test using a standard automatic transmission vehicle. This eliminates the added stress of managing a clutch pedal or stalling out on a steep hill during your evaluation. The vast majority of standard sedans found in rental fleets or available for purchase across the country fall neatly under this classification, making it the perfect choice for regular daily transportation.
Critical Comparisons Between License Classes
Selecting the appropriate track is vital because the passing scores and mechanical requirements vary. The details below illustrate how these two options match up against each other across the testing spectrum.
| Evaluation Metric | Class 1 Ordinary Track | Class 2 Ordinary Track |
| Transmission Type | Manual Only | Automatic or Manual |
| Written Pass Threshold | 70 Points Minimum | 60 Points Minimum |
| Course Pass Threshold | 80 Points Minimum | 80 Points Minimum |
| On-Road Pass Threshold | 70 Points Minimum | 70 Points Minimum |
| Standard Test Vehicle | Utility Pickup Truck | Compact Sedan |
| Max Passenger Capacity | Up to 15 Passengers | Up to 9 Passengers |
Gathering the Essential Documentation
Your journey begins long before you turn an ignition key or sit at a computer terminal. To register for any part of the testing cycle, you must present a highly specific package of legal documents at the regional Road Traffic Authority examination office. Missing even one piece of paperwork can result in a wasted trip, so it is best to prepare your folder carefully ahead of time.
Primary Personal Identification
You must present your physical passport alongside your valid Residence Card, which was previously known as the Alien Registration Card. This identity card proves that you are a legal resident holding a long-term visa status. Tourists or individuals staying on short-term visas that last fewer than ninety days are generally not permitted to go through the standard domestic licensing cycle. Ensure that the names printed on both your passport and your Residence Card match perfectly down to the middle initials.
Official Passport Photographs
You must provide three identical color photographs that meet strict government dimensions of three and a half centimeters by four and a half centimeters. These pictures must be taken within the six months prior to your application date against a solid white background. Your face must be clearly visible, unobstructed by hats, large fashion accessories, or heavy hair arrangements. Two of these pictures will be attached directly to your physical testing application form, while the final photo will be scanned and printed onto your final plastic license.
Financial Requirements for the Licensing Sequence
Navigating the bureaucratic framework involves paying minor administrative fees at each individual stage of the journey. Keeping cash or a local bank card on hand ensures you can progress through the various windows without a hitch. The table below outlines the standard costs associated with the entire testing pathway.
| Step in the Licensing Sequence | Associated Fees in Korean Won |
| Mandatory Health and Aptitude Screening | 6,000 Won to 7,000 Won |
| Computerized Written Examination | 10,000 Won |
| Closed-Course Practical Examination | 25,000 Won |
| Temporary Learner’s Permit Issuance | 4,000 Won |
| On-Road Practical Driving Examination | 30,000 Won |
| Final Physical Driver’s License Production | 10,000 Won to 15,000 Won |
Step One: Mandatory Traffic Safety Education
The initial physical milestone requires you to sit through a dedicated one-hour traffic safety lecture inside an official regional examination branch. This session is completely free of charge, but attendance is a hard legal prerequisite before you are allowed to sign up for the written theory test.
Booking Your Seat for the Seminar
While some testing centers allow walk-in registrations if open seats remain, the safest strategy is to reserve your spot online through the official safe driving portal operated by the Road Traffic Authority. The seminar is conducted via a video presentation that features detailed audio-visual segments.
Even if the primary audio track is delivered in the local language, many centers provide English subtitles or supplementary instructional packets for international attendees. You will need to swipe your identification card at a scanning machine when entering and exiting the lecture hall to log your full hour of attendance into the national tracking system.
Core Concepts Covered in the Safety Seminar
The presentation highlights critical safety considerations that are unique to the domestic driving landscape. You will watch animations and real-world dashcam footage explaining the extreme dangers of driving under the influence of alcohol, the local point-deduction system for traffic violations, and specialized pedestrian safety zones.
Pay close attention to the visual examples depicting how to share the asphalt with city buses, delivery scooters, and public transit grids, as these scenarios form the foundational logic of the driving culture.
Step Two: The Physical Aptitude Screening
Immediately following your safety seminar, you will be directed to the on-site medical office within the testing facility to complete a basic health assessment. This quick physical check ensures that you possess the core sensory capabilities required to operate a motor vehicle safely under variable road conditions.
Visual Acuity Requirements
The primary focus of the medical screening centers squarely on your eyesight. A medical staff member will guide you through a standard eye chart evaluation. To secure a passing mark for a Class 2 license, your combined vision must measure at least zero point five on the decimal scale.
If you are pursuing a Class 1 license, the rules are stricter, demanding a combined visual score of zero point eight or higher, with each individual eye scoring at least zero point five. If you normally wear prescription eyeglasses or corrective contact lenses, you must wear them during this evaluation, and your file will note that corrective lenses are required whenever you operate a vehicle.
Color Perception and Physical Mobility
The medical team will also check your ability to accurately distinguish between red, green, and yellow tones using a standard color plate book. This check is crucial for ensuring you can correctly identify traffic signals and emergency flashers from a distance.
Finally, a quick physical mobility check confirms that you have full control over your extremities, ensuring that you can rapidly move your right foot from the accelerator pedal to the brake pedal without physical restriction or delay.
Step Three: Mastering the Computerized Written Exam
Once your health card is stamped and approved, you can walk directly to the registration counter to sign up for the computerized theory test. This exam does not require any physical writing, as it is conducted entirely on touch-screen computer monitors inside a quiet testing hall.
Language Options and Question Volume
One of the most welcoming aspects of the written test is that it is fully accessible to the international community. You can select your preferred testing language, including English, right on the introductory computer screen before the countdown begins.
The exam consists of forty multiple-choice questions selected from a massive master database. The test gives you a maximum time limit of forty minutes to complete the section. The questions are broken down into several specific testing formats, each carrying a different point weight.
- Sentence-Based Multiple-Choice Questions: These selections test your exact knowledge of speed limits, legal parking rules, and right-of-way hierarchies.
- Signage and Visual Identification: You will look at graphic illustrations of traffic signs and road markings to select their correct legal meaning.
- Photographic Scenario Analysis: The computer displays a photograph taken from a driver’s perspective, requiring you to identify potential hidden hazards.
- Dashcam Video Evaluation: You must watch a short video loop of a driving scenario and identify the safest defensive action to take next.
Crucial Traffic Regulations to Study
To secure a passing grade, you must familiarize yourself with specific traffic laws that may differ significantly from your home country. Focus heavily on studying the unique laws regarding turning right at a red light. In South Korea, you are generally permitted to turn right at a red signal after coming to a complete stop, provided you yield to all crossing pedestrians and oncoming traffic. However, you must look out for specialized right-turn traffic signals that strictly forbid the turn until the arrow turns green.
Additionally, make sure you study the strict rules governing specialized lanes. Major expressways and urban avenues feature dedicated bus lanes marked by thick blue lines. Entering these lanes during restricted operating hours results in heavy automatic fines.
You must also know the strict rules surrounding designated school zones, which feature bright red asphalt and strict speed limits capped at thirty kilometers per hour. Fines and point penalties are doubled for any infractions committed inside these vulnerable areas.
[Defensive Driving Logic]
When analyzing scenarios on the written exam, always prioritize the safety of pedestrians, cyclists, and public transit vehicles over your own lane progression. The correct answer is consistently the one that favors braking, yielding, and creating a wide safety buffer.
Step Four: Conquering the Closed-Course Practical Exam
Passing the written theory exam earns you the right to book your spot for the second major hurdle: the closed-course practical exam, often referred to as the function test. This evaluation takes place on a specialized, closed-circuit obstacle track built right outside the testing building.
The entire vehicle is packed with automated sensors, and a computerized voice system monitors your movements, deducting points instantly if you fail to execute a command within a strict time window. You start the test with a perfect score of one hundred points, and you must maintain at least eighty points to pass.
Phase One: In-Vehicle Device Operation
The test begins before the vehicle even moves an inch. While parked with the engine idling, the automated computer voice will issue a series of precise verbal commands in your chosen language. You will have a brief five-second window following each prompt to operate a specific mechanical control. Missing the timing or activating the wrong lever results in an immediate point deduction.
- Ignition Activation: Demonstrating the ability to cleanly turn the key or press the start button to kickstart the engine.
- Gear Shift Manipulation: Moving the gear selector from park down to drive or reverse, holding it briefly until you hear a confirmation beep, and returning it cleanly to park.
- Turn Signal Deployment: Flipping the control lever down to initiate a left turn signal or up to activate a right turn signal within five seconds of the prompt.
- Windshield Wiper Controls: Switching the wipers on to a functional speed setting and turning them back off to the baseline position when commanded.
Phase Two: Smooth Starting and Hazard Management
Once the stationary device checks are complete, the computer voice will instruct you to begin driving. You must release the parking brake completely, shift into drive, activate your left turn signal to signify your departure, and smoothly accelerate past the starting line. As soon as your front tires cross the initial threshold, you will hear a distinct beep, signaling that you must immediately switch your turn signal off to avoid a penalty.
At any random moment during your journey around the closed course, the vehicle’s speakers may suddenly blare a loud, repetitive audio alarm while a red light flashes on the dashboard dashboard. This simulates a sudden emergency hazard.
The moment you hear this alarm, you have a tight two-second window to slam your foot down on the brake pedal to bring the vehicle to an absolute halt. Once stopped, you have an additional second to push the hazard light button to activate your emergency flashers. You must remain completely motionless and silent until the alarm cuts out. Once the threat clears, turn off your hazard lights, select your driving gear, and resume your path smoothly.
Phase Three: The Dreaded Perpendicular Parking Challenge
The absolute make-or-break section of the closed-course test is the perpendicular parking challenge, frequently known as the T-shape parking space. This test forces you to back your vehicle cleanly into a narrow, concrete-lined parking slip, pull forward, and exit without touching any of the yellow sensory lines bounding the area. Touching a boundary line or running over a curb triggers an immediate five-point deduction from the automated computer system.
Because of the tight margins, mastering this section requires utilizing a consistent spatial alignment strategy based on your vehicle’s physical reference points.
1. Approach and Shoulder Alignment: Keep a wide, consistent distance from the parking entrance.
Drive along the parking access lane, keeping your vehicle roughly one foot away from the yellow curb line on your right side. Stop driving the exact moment your right shoulder aligns perfectly with the center of the target parking slot’s opening.
2. The Forward Angle Maneuver: Create the optimal entry angle for backing up.
Turn your steering wheel completely to the left, lock it in place, and slowly roll forward. Keep your eyes glued to your right side mirror until you see the corner of the parking curb align with the rear panel of your vehicle, then stop completely.
3. Reverse Entry Execution: Slowly guide the vehicle into the narrow slot.
Shift your gear selector into reverse, turn your steering wheel completely to the right until it hits the lock point, and slowly ease off the brake. Allow the vehicle to drift backward into the slot, checking both side mirrors to verify that your side panels remain perfectly equidistant from the left and right boundary lines.
4. Straighten and Reset: Back up fully to register your completion with the sensors.
As soon as your vehicle sits perfectly parallel to the parking space walls, straighten your steering wheel by returning it to the center. Continue rolling straight backward until your rear tires cross over the white sensory tape at the very back of the slot, which triggers a distinct voice confirmation stating “Information Confirmed.” Pull your electronic parking brake up, wait for the processing beep, release the parking brake, shift back into drive, and carefully turn right to exit the zone.
Phase Four: Acceleration and Hill Starting
The final segments of the circuit test your control over your vehicle’s speed and momentum. You will approach a marked uphill incline where you must bring your vehicle to a complete stop between two white lines. You must hold the vehicle steady without rolling backward more than a few inches, then smoothly accelerate up and over the crest.
Shortly after descending the hill, you will encounter a straightaway featuring an acceleration zone signpost. The moment your vehicle passes this sign, you must step down firmly on the accelerator pedal to push your speed past twenty kilometers per hour.
However, you must be prepared to brake heavily just before the end of the designated zone to drop your speed back below twenty kilometers per hour before you cross the exit marker. Maintaining an incorrect speed in this zone results in an immediate point deduction.
Step Five: The Temporary Learner’s Permit
Victory on the closed-course circuit earns you a vital intermediary document: the Temporary Learner’s Permit. This permit is an electronic validation attached directly to your physical master application paperwork. It holds a strict validity window of exactly one year from the issue date, giving you ample time to practice your real-world driving skills.
Legal Requirements for Using the Permit
The learner’s permit is highly restrictive and comes with strict safety stipulations that you must respect to avoid legal trouble. You are strictly forbidden from operating a vehicle on public roads by yourself.
Whenever you are behind the wheel, you must be accompanied by a licensed adult who has held a clean, full domestic driver’s license for a continuous period of at least two years. This supervising passenger must sit in the front passenger seat, fully alert and ready to assist you or pull the emergency brake if a dangerous situation unfolds.
Creating and Placing the Practice Signage
When hitting public streets on a learner’s permit, you must give clear visual warning to all surrounding motorists. You are required to create and display specialized practice sheets on the vehicle you are using.
You must cut out two rectangular signs measuring thirty centimeters in width by eleven centimeters in height. The signs must feature the specific word “Practice Driving” printed in large, bold font.
One of these signs must be taped securely to the center of your front windshield, while the second sign must be attached to the center of your rear window. This signage ensures that surrounding drivers, bus operators, and delivery riders know to give you extra space and patience as you build up your road confidence.
Step Six: Ace the Ultimate On-Road Driving Test
The final barrier separating you from your official license is the on-road practical driving exam. This test evaluates your ability to handle real-world traffic scenarios, complex intersections, variable lane changes, and unexpected pedestrian movements.
An official examiner will sit in the front passenger seat holding a digital tablet connected to the vehicle’s internal tracking array. The tablet uses a GPS navigation system that plays automated voice directions telling you exactly where to turn.
Preparing for the Four Standard Driving Routes
Every regional testing branch maps out four distinct driving courses, which are universally designated as Route A, Route B, Route C, and Route D. Each individual route covers a physical distance stretching between four and five kilometers, looping through the busiest commercial and residential streets surrounding the facility.
The moment you sit down in the driver’s seat, the examiner will hold up the tablet and prompt you to press a button on the screen. The computer will randomly assign one of the four routes to you on the spot.
Because you cannot choose your favorite course, you must take the time to study and memorize the unique quirks of all four routes beforehand. Many foreign applicants find it incredibly helpful to watch video drive-throughs of these courses on popular video streaming platforms. Search using the name of your local branch combined with the specific phrase for road test courses to find detailed video guides that point out tricky lane changes, hidden signs, and complex intersections.
Pre-Drive Inspections and Launch Etiquette
Your evaluation kicks off before you ever twist the ignition key. When your name is called, walk purposefully around the entire perimeter of the testing vehicle, pausing briefly at all four corners to check the tires, look for under-vehicle leaks, and verify that the path is clear. Once you slide into the cabin, follow a strict internal routine.
- Seat and Mirror Calibration: Adjust your physical seat distance, steering wheel height, and rear-view mirrors, even if they already seem perfectly fine. This shows the examiner that you prioritize safety.
- Seatbelt Fastening: Buckle your seatbelt securely and verify that the examiner has done the same before proceeding.
- Systems Check: Verify that the emergency parking brake is pulled high and that the transmission selector rests firmly in the park position.
- Turn Signal Signal: Start the engine, press down on the brake pedal, drop the selector into drive, release the handbrake, and flick your left turn signal down. Look over your left shoulder to check your blind spot for passing traffic before smoothly accelerating away from the curb.
Scoring Deductions and Automatic Failures
You begin the road evaluation with a clean slate of one hundred points, and you must protect your score to finish above the minimum passing threshold of seventy points. The physical examiner and the automated tablet work together to log deductions ranging from three to ten points for various minor driving mistakes.
- Failing to Use Turn Signals: You must activate your turn signal at least thirty meters before executing any turn or changing lanes, and you must leave it running until the maneuver is fully complete. Turn it off too early, and you lose points.
- Neglecting the Neutral Gear Rule: Whenever your vehicle comes to a complete halt at a red light or inside a traffic jam for more than ten seconds, you must shift your gear lever out of drive and into neutral. You must keep your foot pressed firmly on the brake pedal while in neutral. Failing to do this results in an automatic five-point deduction for every single occurrence.
- Poor Lane Discipline: Weaving inside your lane, changing lanes across solid white lines, or changing lanes inside the middle of a busy intersection triggers immediate point deductions.
While point deductions can be managed, certain critical driving errors will result in an immediate, unappealable automatic failure. If you trigger an automatic failure, the examiner will take control of the vehicle and drive you back to the center immediately.
- Running a Red Traffic Light: Passing through an intersection on a steady yellow or solid red light results in an instant failure.
- Speeding Violations: Exceeding the posted speed limit by even a few kilometers per hour for a sustained period will terminate your test on the spot.
- Pedestrian Safety Violations: Failing to yield to a pedestrian who has stepped onto a crosswalk or entering an active school zone while ignoring safety rules triggers an immediate fail.
- Causing an Near-Collision: If your actions force the examiner to stomp on their auxiliary passenger brake pedal or grab the steering wheel to prevent an accident, you fail instantly.
Step Seven: Claiming Your Physical Driver’s License
The moment you pull back into the testing center parking lot and the computer tablet chimes with a passing score, you have completed the journey. Gather your stamped master application sheet, your original Residence Card, your passport, and your remaining passport photograph, and walk up to the main issuance counters.
Standard Domestic License versus the International English Version
When paying your final production fee, you will be given a choice between two distinct physical license variations. The standard domestic version features your text and details printed purely in the local script on the front face, with a blank back face.
The far superior option for global citizens is the bilingual English driver’s license. For a minor additional fee of a few thousand won, the authorities will print your vital credentials in English on the reverse side of the plastic card. This bilingual version is legally recognized as a valid driving permit in dozens of countries worldwide, saving you from needing to secure an International Driving Permit when traveling abroad.
Processing and Waiting Windows
You do not need to wait weeks for a shipping carrier to deliver your new card to your home address. The regional testing centers feature high-speed on-site printing systems.
After handing over your paperwork and paying the production fee at the designated window, you simply sit in the waiting area for roughly fifteen to thirty minutes. When your name flashes on the overhead media screens, you walk up to collect your brand-new, valid South Korean driver’s license.
Frequently Asked Questions
Can I take the written exam in languages other than English or Korean?
Yes, the computerized theory testing system features built-in translations for several major global languages. Aside from English and Korean, applicants can choose to take the test in Chinese or Vietnamese. You can select your preferred language option directly on the introductory touch screen before the testing timer starts.
What happens if I fail the closed-course test or the on-road test?
If you do not secure a passing score on either of the practical driving evaluations, you are allowed to retake the test. However, you are subject to a mandatory legal waiting period of three full days before you can try again. This cooling-off window is designed to give you sufficient time to practice your weak maneuvers before stepping back onto the evaluation grounds.
Can I complete the entire testing sequence using my own personal car?
No, you are not permitted to use a personal vehicle for either the closed-course function test or the final on-road examination. You must use the official, government-issued testing vehicles provided by the Road Traffic Authority center. These vehicles are modified with auxiliary passenger brake pedals for the examiner’s safety and are outfitted with specialized electronic sensors that connect directly to the scoring computers.
How long is the South Korean driver’s license valid for foreign residents?
Once issued, a standard Class 1 or Class 2 ordinary license remains fully valid for a period of ten years for individuals under the age of seventy. However, your right to drive within the country remains tied to your legal stay. If your visa expires and you do not renew your Residence Card, your physical permit cannot be used legally on public roads.
Do I need to attend a private commercial driving academy to pass these tests?
Enrolling in a private commercial driving school is completely optional. Many foreign residents choose to save money by studying the free material online and booking their tests directly through the government centers. However, if you find the closed-course parking or on-road routes intimidating, attending a private academy gives you access to practice tracks and dedicated instructors, though it comes at a much higher financial cost.